Text alignment
La alineación del texto en un documento LaTeX se puede controlar manualmente mediante diversos comandos. En éste artículo se explica cómo cambiar la alineación ya sea para parte del texto o para todo un documento.
Introducción
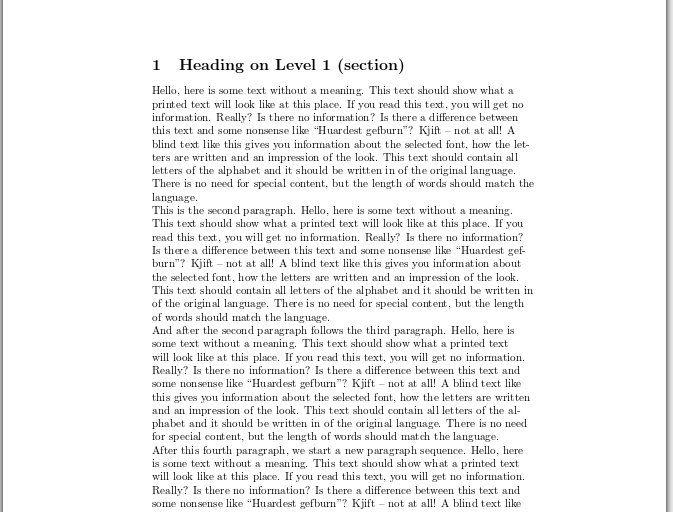
Por defecto el texto en LaTeX está justificado a ambos lados, pero con frecuencia el texto alineado a la izquierda es un formato más apropiado para el documento. Alinear texto a la izquierda es fácil por medio del paquete ragged2e.
\documentclass{article}
\usepackage[utf8]{inputenc}
\usepackage[T1]{fontenc}
\usepackage[english]{babel}
\usepackage[document]{ragged2e}

\begin{document}
\section{Heading on Level 1 (section)}

Hello, here is some text without a meaning.  This text should show
what aprinted text will look like at this place.  If you read this
text, you will get noinformation...

\end{document}
La línea
\usepackage[document]{ragged2e}
importa el paquete ragged2e y justifica a la izquierda el texto. Consulta la siguiente sección para más información sobre cómo funciona el paquete.
Usando el paquete ragged2e
Hay varios comandos estándar en LaTeX para cambiar la alineación del texto. Una alternativa a esos comandos es proveida por el paquete ragged2e.
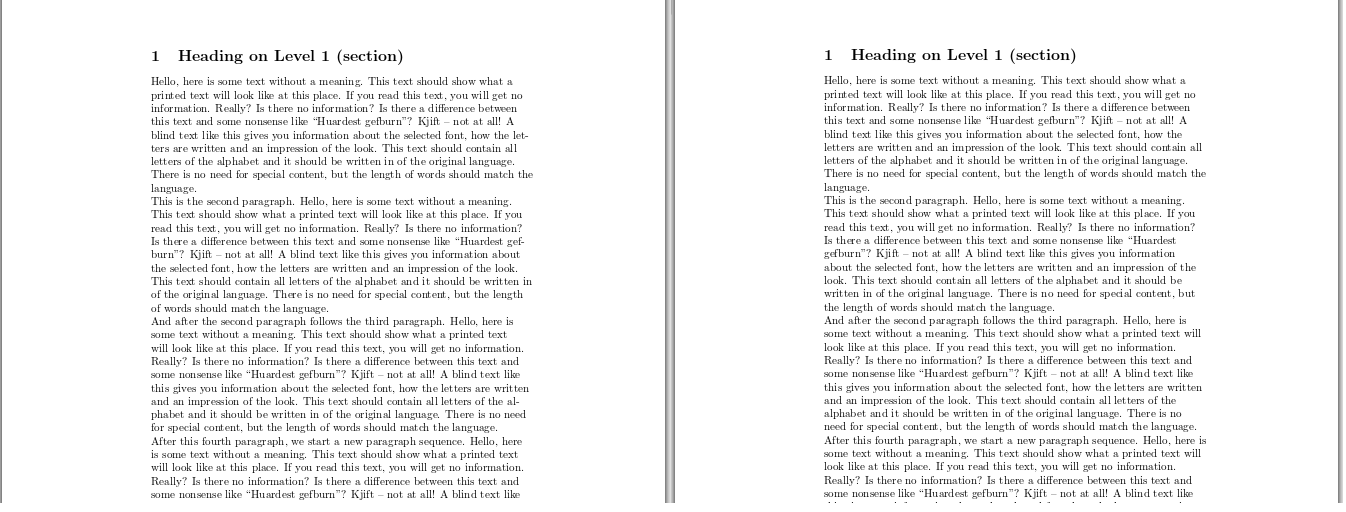
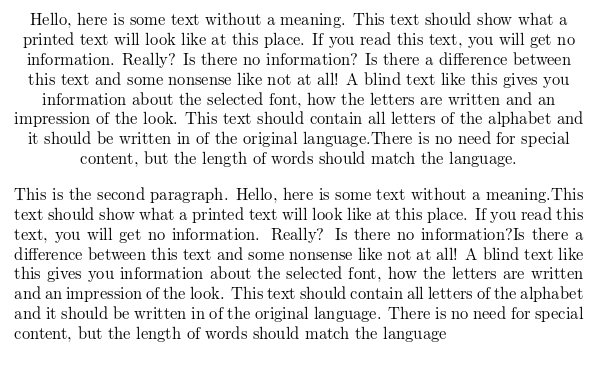
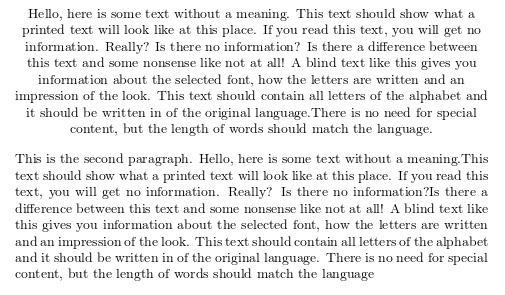
Cuando uno alinea su documento a la izquierda o a la derecha, a veces el texto se ve «muy rasgado», muy disparejo. El paquete ragged2e ataca este problema permitiendo el uso de guiones para separar palabras cuando la línea se queda demasiado corta, generado una orilla más uniforme. En seguida se presenta el ejemplo mostrado en la introducción comparado con el mismo texto alineado usando sólo comandos estándar de LaTeX.
El paquete provee comandos alternativos para texto alineado a la izquierda, texto alineado a la derecha y texto centrado que soportan separación por guiones. Para poder usar éstos comandos es necesario importar el paquete primero, añadiendo la siguiente línea en el preámbulo:
\usepackage{ragged2e}
Ejemplos alternativos a los descritos en este artículos se presentan en el siguiente enlace: Abrir ejemplo del paquete ragged2e en Overleaf
Texto alineado a la izquierda
El ambiente por defecto para alinear texto a la izquierda es flushleft
\begin{flushleft}
Hello, here is some text without a meaning.  This text should show what
a printed text will look like at this place.  If you read this text,
you will get no information.  Really?  Is there no information?  Is there
a difference between this text and some nonsense like not at all!  A
blind text like this gives you information about the selected font, how
the letters are written and an impression of the look.  This text should
contain all letters of the alphabet and it should be written in of the
original language.There is no need for special content, but the length of
words should match the language.
\end{flushleft}

This  is  the  second  paragraph. Hello, here is some text without
a meaning.  This text should show what
a printed text will look like at this place.  If you read this text,
you will get no information.  Really?  Is there no information?  Is there
a difference between this text and some nonsense like not at all!  A
blind text like this gives you information about the selected font, how
the letters are written and an impression of the look.  This text should
contain all letters of the alphabet and it should be written in of the
original language.There is no need for special content, but the length of
words should match the language.
El texto entre los comandos \begin{flushleft} y \end{flushleft} está alineado a la izquierda. El ambiente correspondiente en ragged2e es FlushLeft.
El comando conmutador \raggedright también produce texto alineado a la izquierda, pero el comportamiento de éste comando es diferente; en este caso el texto permanecerá alineado a la izquierda hasta que otro comando conmutador lo cambie. Éste comando es adecuado cuando se requiere cambiar la alineación de bloques muy largos de texto o incluso todo el documento. El comando equivalente en ragged2e es \RaggedRight.
Texto alineado a la derecha
Alinear texto a la derecha es fácil por medio del ambiente \flushright.
\begin{flushright}
Hello, here is some text without a meaning.  This text should show what
a printed text will look like at this place.  If you read this text,
you will get no information.  Really?  Is there no information?  Is there
a difference between this text and some nonsense like not at all!  A
blind text like this gives you information about the selected font, how
the letters are written and an impression of the look.  This text should
contain all letters of the alphabet and it should be written in of the
original language.There is no need for special content, but the length of
words should match the language.
\end{flushright}

This  is  the  second  paragraph. Hello, here is some text without
a meaning.  This text should show what
a printed text will look like at this place.  If you read this text,
you will get no information.  Really?  Is there no information?  Is there
a difference between this text and some nonsense like not at all!  A
blind text like this gives you information about the selected font, how
the letters are written and an impression of the look.  This text should
contain all letters of the alphabet and it should be written in of the
original language.There is no need for special content, but the length of
words should match the language.
El texto entre los comandos \begin{flushright} y \end{flushright} está alineado a la derecha. Si prefieres ragged2e, el comando correspondiente es ese paquete es FlushRight.
El comando conmutador \raggedleft también produce texto alineado a la derecha, pero el comportamiento de éste comando es diferente; en este caso el texto permanecerá alineado a la derecha hasta que otro comando conmutador lo cambie. Éste comando es adecuado cuando se requiere cambiar la alineación de bloques muy largos de texto o incluso todo el documento. El comando equivalente en ragged2e es \RaggedLeft.
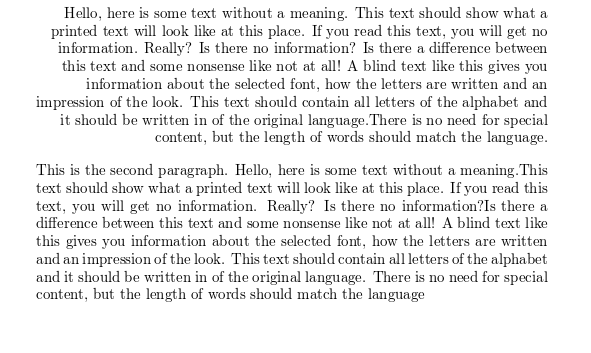
Texto centrado
Para centrar un bloque de texto se debe usar el \center
\begin{center}
Hello, here is some text without a meaning.  This text should show what
a printed text will look like at this place.  If you read this text,
you will get no information.  Really?  Is there no information?  Is there
a difference between this text and some nonsense like not at all!  A
blind text like this gives you information about the selected font, how
the letters are written and an impression of the look.  This text should
contain all letters of the alphabet and it should be written in of the
original language.There is no need for special content, but the length of
words should match the language.
\end{center}

This  is  the  second  paragraph. Hello, here is some text without
a meaning.  This text should show what
a printed text will look like at this place.  If you read this text,
you will get no information.  Really?  Is there no information?  Is there
a difference between this text and some nonsense like not at all!  A
blind text like this gives you information about the selected font, how
the letters are written and an impression of the look.  This text should
contain all letters of the alphabet and it should be written in of the
original language.There is no need for special content, but the length of
words should match the language.
El texto entre los comandos \begin{center} y \end{center} está alineado a la derecha. Si prefieres ragged2e, el comando correspondiente es ese paquete es Center.
El comando conmutador \centering también produce texto alineado al centro, pero el comportamiento de éste comando es diferente; en este caso el texto permanecerá centrado hasta que otro comando conmutador lo cambie. Éste comando es adecuado cuando se requiere cambiar la alineación de bloques muy largos de texto o incluso todo el documento. El comando equivalente en ragged2e es \Centering.
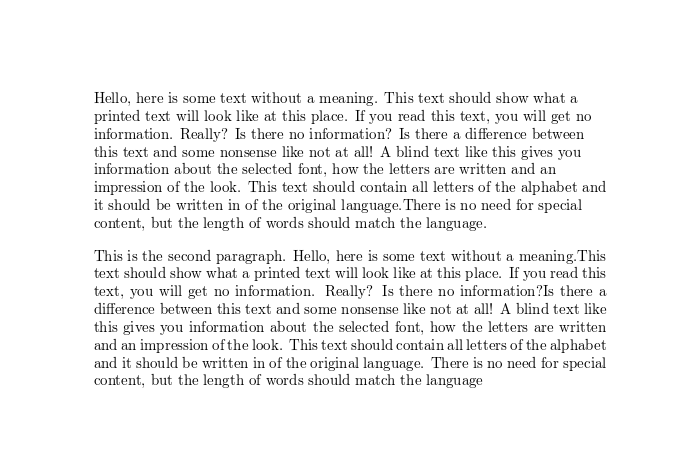
Texto justificado
En LaTeX el texto está justificado por defecto y si se usa alguno de los comandos conmutadores \raggedright o \raggedleft la alineación ya no se puede revertir. Para estos casos la opción es usar el paquete ragged2e. Se debe importar añadiendo el comando \usepackage{ragged2e} en el preámbulo del documento, una vez hecho ésto se puede usar el comando justify tal como se muestra en el siguiente ejemplo:
\centering
Hello, here is some text without a meaning.  This text should show what
a printed text will look like at this place.  If you read this text,
you will get no information.  Really?  Is there no information?  Is there
a difference between this text and some nonsense like not at all!  A
blind text like this gives you information about the selected font, how
the letters are written and an impression of the look.  This text should
contain all letters of the alphabet and it should be written in of the
original language.There is no need for special content, but the length of
words should match the language.

\justify
This  is  the  second  paragraph. Hello, here is some text without
a meaning.  This text should show what
a printed text will look like at this place.  If you read this text,
you will get no information.  Really?  Is there no information?  Is there
a difference between this text and some nonsense like not at all!  A
blind text like this gives you information about the selected font, how
the letters are written and an impression of the look.  This text should
contain all letters of the alphabet and it should be written in of the
original language.There is no need for special content, but the length of
words should match the language.
El primer párrafo en el ejemplo es centrado por medio del comando conmutador \centering y posteriormente su alineación se revierte a texto justificado por medio de \justify.
ragged2e también provee un ambiente homónimo, justify que permite justificar bloques de texto en un documento que esté completamente alineado a la izquierda o a la derecha.
Abrir un ejemplo del paquete ragged2e en Overleaf
Guía de referencia
Resumen de comandos y ambientes para alinear texto
| Alineación | Ambiente | Comando conmutador | Ambiente en ragged2e | Comando conmutador en ragged2e |
|---|---|---|---|---|
| Izquierda | flushleft
|
\raggedright
|
FlushLeft
|
\RaggedRight
|
| Derecha | flushright
|
\raggedleft
|
FlushRight
|
\RaggedLeft
|
| Centrar | center
|
\centering
|
Center
|
\Centering
|
| Justificado | justify
|
\justify
|
Open an example of the ragged2e package in Overleaf
Lecturas adicionales
Para más información consultar:
- Paragraphs and new lines
- Paragraph formatting
- Bold, italics and underlining
- Font sizes, families, and styles
- Font typefaces
- Supporting modern fonts with XeLaTeX
- Line breaks and blank spaces
- Lists
- Sections and chapters
- Multiple columns
- Single sided and double sided documents
- The not so short introduction to LaTeX2ε
- The ragged2e package documentation